Usually, the business owner starts working with designers and engineers with only 20% of his product scope understanding.
Our overall goal is to build product vision together at the very beginning of a development cycle and not at the end of developing a product-he-doesn’t-need and which doesn’t solve consumers problems. Here are few general words about how Railsware does that approach.
Step 1. Interview, definition of benefits
First and foremost, we particularize what product should be created during the interview with business owner. The very most important part is a deep understanding of what benefits the business should deliver to its consumers.
Step 2. ColorScope – a way for critical (close to 100%) data acquisition and prioritization
All the data collected during interviews is being divided into descriptive parts, then being coded by color according to its magnitude and priority.
Steps 1 and 2 can be repeated as many times as needed.
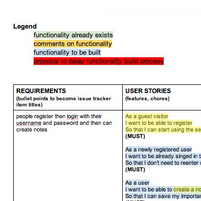
Step 3. User Stories
Product functionality consists of logical parts. Within every single part, user can make only one action (e.g., to sign in). All possible behaviors of a functional part (e.g., entering wrong data, output of errors) are described in user stories. Every user story is finished by its benefit description. So you can see all the components and screens needed to be created, including the smallest ones.
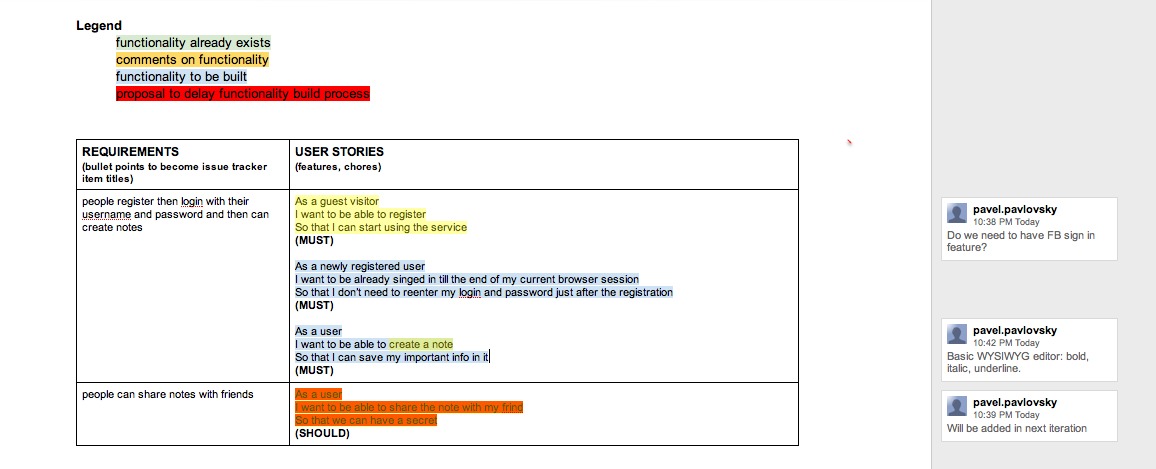
Step 4. Flow Document
When product vision is finally created, it is time to step forward and visualize product by screens based on user stories. Instead of sending tons of emails, we decided to organize space for all screens and comments grouped into iterations. This documentation method we call FlowDoc.
FlowDoc – is a Google Sites document comprising product description divided into iterations (flows), with mockups and final designs. FlowDoc makes it easy to synchronize team members, to share updates, to edit and comment.
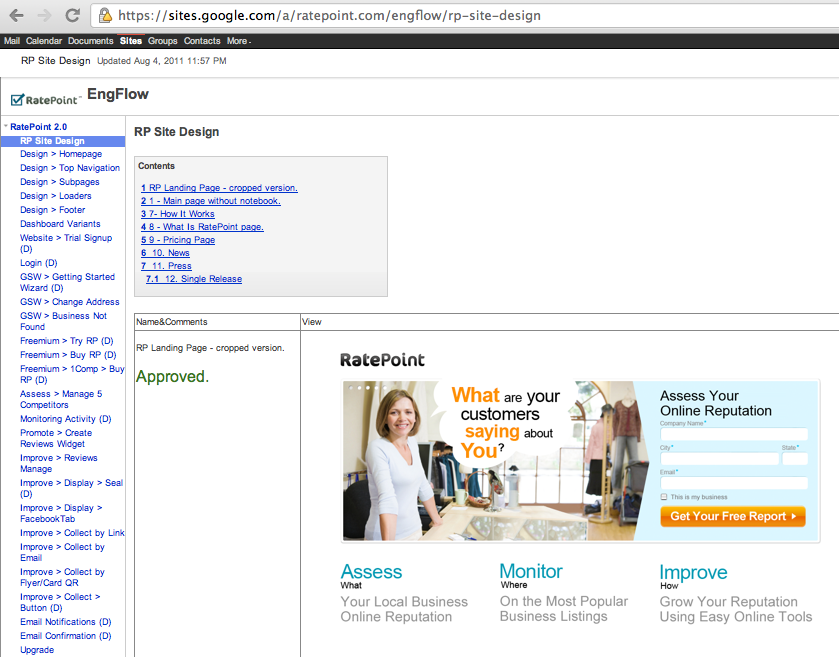
We use DropBox as a screen storage space. Screens are to be placed in Public folder. For screen sharing, you need to copy Public Link of a file and put it into Google Sites document. All folders with screens are named according to documentation parts (e.g., Register on Site). A screen filename is the name of a certain user story.
Designer needs to put pictures into the document just once. To provide full-automatic screen updating he or she just need to renew files in DropBox. This update action can be implemented by one click. Below are some tips for popular graphics editors.
Exporting screens from Adobe Fireworks
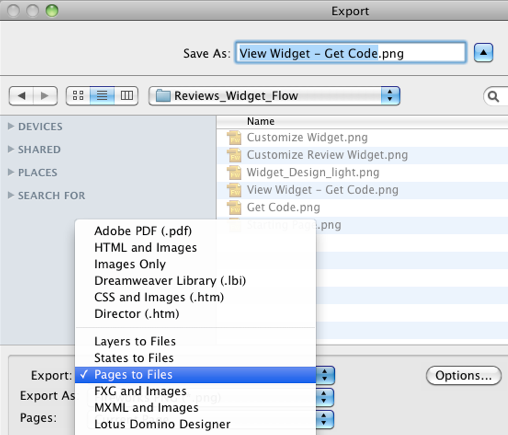
This program natively supports multi-page mode. It means you can hold all product screens in one file. So, page-by-page export can be provided into any graphic format by Export Pages to Files.
Exporting screens from Adobe Photoshop
There is no multi-page support in Photoshop. In this case, we need to use one trick – Layer Comps. Layer Comp is a special layer with information about object placement, visibility and style. Comps can be accessed through the Layer Comps Panel.
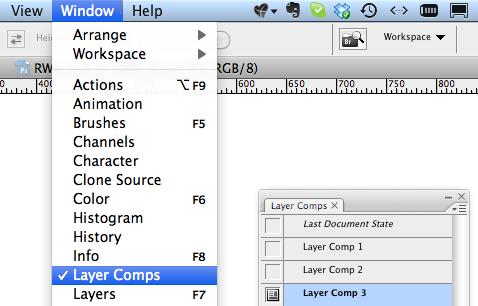
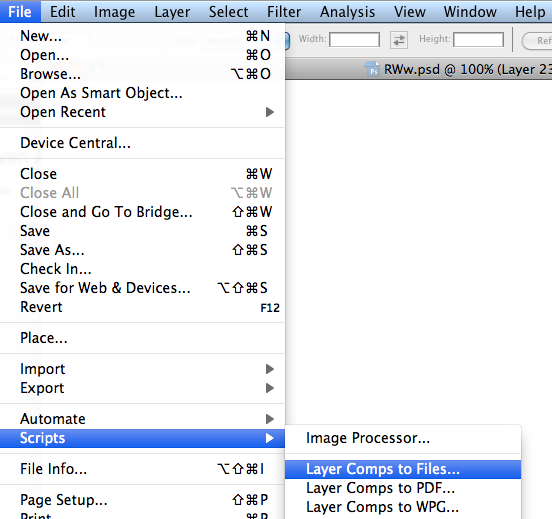
We can imitate multiple pages by saving layers’ and folders’ visibility in Layer Comps being named as the respective application pages. In this case, switching between Layer Comps looks like switching between application screens. Every Comp can be exported as a separate JPEG or PNG file. Thus, exporting all pages from one file takes less time than exporting pages from separate files – only few seconds. You just need to run a script from the menu File > Scripts > Layer Comps to Files.
That’s how easy and vivid product design method looks like. It is ours and it works! ;-)