This is a guide for product managers and startup founders who want to streamline the early product development process. We’ll explain the benefits of rapid prototyping, what sets it apart from other product validation techniques, and how to create a prototype from scratch. So, let’s dive in.

What is rapid prototyping in software development?
Rapid prototyping is the process of transforming a product idea into a digital, interactive model. We do it to gather feedback from stakeholders and check if a product is worth the time and effort of full-scale development.
Why ‘rapid’ though? Because prototyping doesn’t have to be a complex, grueling exercise. Instead, rapid prototyping is about creating a basic, testable model in the least amount of time possible. Like throwaway prototyping, it emphasizes the importance of building quickly, minimizing engineering costs, and iterating based on feedback.
On a high level, rapid prototyping also has ties to agile approaches like Lean (principles: build, measure, learn) and Rapid Application Development (RAD). Surprisingly, though, the technique actually originates from the manufacturing industry, where it refers to 3D printing and CAD models.
In this article, we’ll focus on rapid prototyping as an approach to digital product development (rather than feature development). That said, a lot of our advice still applies to the latter.
Rapid prototype, POC, MVP – where to start?
‘Prototype’ is often used interchangeably with proof of concept. It can also be confused with an early-days functional product. But here’s how we differentiate between them:
Proof of Concept (POC) – a small-scale test conducted to validate a technical hypothesis (e.g. Is this the right tech stack? Can we actually build this API?)
(Rapid) Prototype – an interactive visualization or digital model of your product idea (e.g. a clickable product walkthrough in Figma).
Minimum Viable Product (MVP) – a fully functional, early rendition of your product that contains the minimum amount of features.
For a closer look at the differences between these three development concepts, read POC, Prototype, MVP – How to Start Small.
It’s not essential to create a POC (in special cases, even a prototype) before building an MVP. It really depends on the type of product you’re trying to build. The more unique or technically ambitious your idea is, the more steps your early development process will have.
That said, we usually don’t skip out on prototyping when creating products for ourselves or our clients. In fact, we’ve made it the second main step in our product development process (following product discovery with the BRIDGeS framework). For us, rapid prototyping is the most efficient way to assess the form and function of a future product. It’s an excellent vessel for gathering high-quality feedback too. Here are a few other benefits.
Benefits of rapid prototyping
- Saves time in the long run. As we said, rapid prototyping aims to speed up the idea validation stage of product development. It focuses on quick experimentation rather than tedious planning or refinement of an initial, unsuitable idea. Best case scenario, you validate your idea on the first go, and end up shortening the path to market.
- Mitigates risk of product failure. Prototypes are disposable testing tools. If your solution doesn’t work, you can always throw it out and try again. Although not ideal, it still beats spending months creating a working product and launching it on the market, only to see it fail due to a critical design mistake.
- Helps pinpoint design flaws. You can’t avoid tech debt or prevent bugs from showing up in your final product. But by creating a prototype, your team has a better chance of catching design flaws before they can be implemented and cause actual damage.
- Gather feedback early. Providing stakeholders with an interactive representation of your product idea is the most efficient way to collect detailed, accurate feedback. It’s a cliche, but humans are visual creatures. It’s much easier for us to describe the strengths/weaknesses of something we’ve seen and used, than identify the same things in a product sketch.
- Helps minimize engineering costs. You don’t need to engage several engineers or designers in the rapid prototyping process. Oftentimes, it only takes one or two product experts to create a full-blown prototype using free, no-code tools (such as Axure, Figma, or Google Sheets). Surprised to see GSheets mentioned here? Read our case study further down to understand how we validated a product idea with a GSheets prototype.
What form should a rapid prototype take?
Factors like industry, niche, and audience will affect the ‘shape’ of your prototype. For example, building a prototype for a fintech app will look very different from a prototype for an Atlassian marketplace add-on. Again, the complexity of your product idea also influences how it should look and how much functionality it should have.
Let’s try and break it down. On a high level, there are two types of prototypes:
- Minimally functional prototypes
- Product/UX design prototypes
If it’s a new and untested concept (at least for your team) you may want to create a smaller, minimally functional prototype first – just to play around with different technical approaches and tool combinations. Tools like Figma or InVision won’t be much help to you here, but that doesn’t mean you need to get engineers involved immediately. Instead, you could experiment with platforms like Google Sheets, Airtable, Bubble, or Webflow to create a testable, no-code solution.
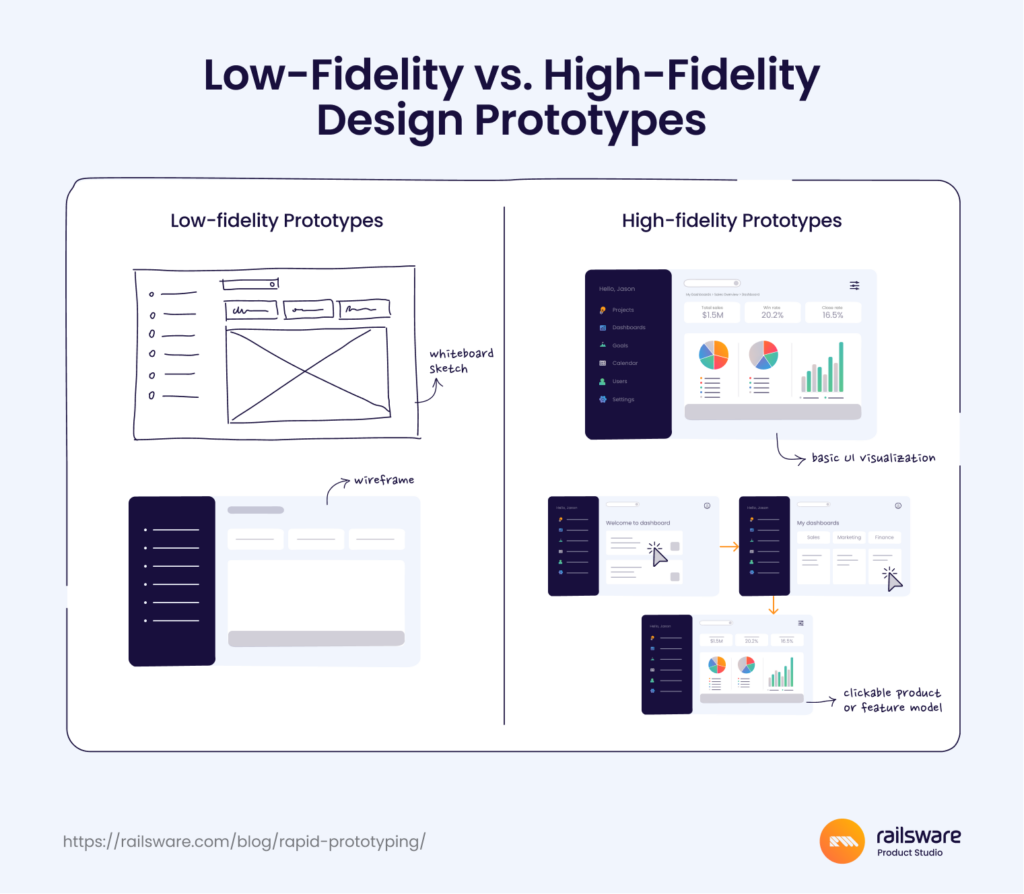
On the other hand, if you’re more concerned about the UX design aspect of your product idea, you can start with a product design prototype. There are generally two ways of classifying them: low-fidelity prototypes and high-fidelity prototypes. You may find that utilizing webflow’s web design services facilitates the creation of both prototypes, ensuring a user-centric approach to your development process.
Low-fidelity design prototypes are simplified representations of the product idea. Some examples are wireframes, whiteboard sketches, and very basic mockups.
Low-fi prototypes provide a conceptual foundation for more advanced prototypes but aren’t suitable for testing. Few product stakeholders are involved in their creation. At Railsware, it’s usually a product designer and product manager who work together to create and approve wireframes or mockups.
High-fidelity design prototypes are interactive models that can be shared with a wider audience. They closely resemble the look and feel of a finished product but don’t have any built-in functionality. Product designers usually own this process, but input from product managers, the development team, and even marketing/sales experts is typical.
Five steps of the rapid prototyping process
The process of developing a minimally functional prototype or a UX design prototype is more or less the same. Regardless of what shape your prototype takes, you still need to conduct research on your target audience, screen ideas, build something tangible, and request feedback on your solution. Let’s explore each of the steps in more detail:
1. Understand who you’re building for
At Railsware, we aim to conduct in-depth customer research before jumping into idea generation or visualization. We want to develop ideas that are grounded in truth; ideas that properly address user needs. Having a general vision, or conducting market research, isn’t enough.
We’d recommend running 30-minute customer development interviews to better understand end-users’ problems. You can initiate this step as a product manager or startup founder, by reaching out to people in your LinkedIn or X (formally Twitter) networks. If you already have a mature product, you could also review suggestions from existing customers or survey them. The results of this research will help set the direction for the next step.
2. Shaping ideas and requirements
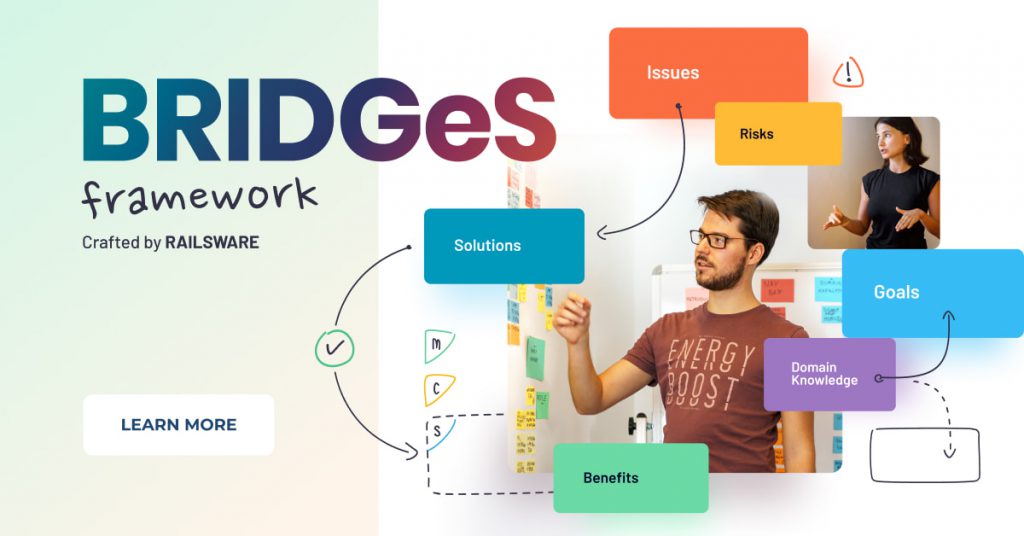
Several cross-functional stakeholders are involved at this stage. We typically kickstart product discovery with BRIDGeS – a flexible framework for multi-context decision-making. Sessions are run by a product manager and can involve members of the design, engineering, marketing, and data analytics teams (up to 6 people).
We start with a ‘Subject’, which could be our imagined end-user or a proposed strategy. In the Problem Space, we discuss the Benefits, Risks, and Issues (BRIs) associated with our Subject. We also list the Goals. Then we move into the Solution Space, where we start to shape viable ideas and screen them.
Once we’ve chosen an idea, our product manager gets to work setting the product requirements. Not a lot of time is spent on this task, as we simply want to build a basic visualization at the start – not a full-blown product.
Optional: Create a proof of concept after ideation
As we said earlier, creating a POC isn’t a mandatory step in the software development process. But if you have doubts about the complexity of your proposed solution, or aren’t sure if you have enough tech expertise/resources to bring your idea to life, then now’s a good time to check. Usually, creating a POC is a job for the engineering team. It should take no more than a couple of weeks to design and review.
3. Build the prototype
Now it’s time to create the actual prototype. At this stage, the key is to focus on fixing the problem that your potential customers have, rather than trying to impress them with polished user interfaces or cool animations. The final result should represent the essence of your product idea. Simulate the core functionality, then create a logical flow and simplified interface. With minimally functional prototypes, you want to strike a balance between ‘it solves the user’s main problem’ and ‘it’s fairly easy to use.’
Be proactive and reach out to people who could benefit from your solution. That may include:
- Colleagues from relevant functions (e.g. other product managers, customer support)
- Your in-context connections (friends, industry peers, etc.)
- Friends and relatives of your teammates who match the ideal customer profile (ICP)
To find more volunteers, you could also create a LinkedIn post that briefly describes your project, states who your ICP is, and asks people to tag who they know.
If you have an existing audience for another one of your products, you can also reach out to customers within relevant segments. In the same vein, if you previously ran CustDev interviews, now is the time to get back in touch and invite them to a demo.
5. Gather feedback and iterate
Request feedback during demo calls or via surveys. To solicit valuable suggestions, ask open-ended questions whenever possible e.g. ‘How does our solution compare to others you may have tried?’ ‘What would you expect to see in a future working version?’
We typically use forms or documentation hubs (like Coda.io, Confluence) to collect responses and look for patterns in the feedback. Obviously, you don’t have to take every suggestion or criticism on board. You just need to determine if your team is on the right path. Then, you can either toss the prototype and start again with a different approach, or make revisions and improve the existing solution.
Now that we’ve explained each step, let’s look at a real-life example of rapid prototyping.
Railsware’s rapid prototyping experience: Creating an AI Jira Add-on
Over the past several months, our TitanApps team has been busy creating a set of productivity tools for Jira and monday.com. Our latest release – Smart AI Insight – is a tool for summarizing content in Jira. Here’s how we incorporated rapid prototyping into the development process.

Smart AI Insight: The beginnings
It all started with an ideation session powered by the BRIDGeS framework. Our team’s goal was to improve company management processes, and the recent hype around Large Language Models (LLMs) caught our attention.
Since we were already using GPT models to streamline our work, particularly Jira-related tasks, the idea of developing a Jira content summarization tool quickly emerged (among several others). The goal was to automate the creation of release notes or general summaries for product managers.
After the ideation session, we selected the most promising ideas and prepared them for testing. Our TitanApps Product Manager (PdM) and company Infrastructure Engineer teamed up to bring the Jira content summarization idea to life. They designed a no-code solution by connecting Jira as a data source (using Coupler.io), and GPT for Sheets and Docs (a third-party tool for accessing the Open AI API) to a spreadsheet in Google Sheets. And with that, we’d validated the core idea – next up, rapid prototype.
Creating the prototype
Our TA PdM and Infrastructure Engineer iterated on the solution, designing a basic UI for Smart AI Insight in the Google spreadsheet. Using dropdown lists and proper formatting, they included an additional product description and added the ability to filter tickets and configure the output format of the summary.
Then, to gauge interest in the initial prototype, our TitanApps PdM ran a demo for several of our in-house Product Managers. For those who volunteered to test it, the team configured the prototype to their Jira projects, before handing it over for testing.
Feedback was generally positive. Most PdMs agreed that the tool was best for generating release notes; the content they received was well-structured and accurate. There was still room for improvement, however. So, the team experimented with some prompting techniques and instructions that would allow the GPT to generate more concise, engaging summaries.
What happened next?
This feedback helped shape the vision for the final step: a Smart AI Insight MVP. Based on our rapid prototype concept, we built a fully functional version of the product using Atlassian’s Forge platform.
Overall, the journey from ideation to rapid prototype to MVP took about 8-12 weeks. Our prototype wasn’t exactly nice to look at, or super easy to use, but crucially, it did what we needed it to do – validate our idea with feedback from real users.
Our golden rules for rapid prototyping
1. Keep it simple
With prototypes, we always aim for a ‘good enough’ representation of the product. We don’t dedicate a lot of time to prototyping in the first place – maybe a few weeks, a month tops. In our experience, most prototypes never make it past the initial testing stage. Even if we do happen to validate the idea, we’ll use different tools and a larger team to build a fully functional solution.
Use a prioritization framework like MoSCoW (Dai Clegg’s method) to distinguish between must-haves and nice-to-haves. In general, though, you can save additional feature mock-ups, non-essential functionality, complex animations, and proper onboarding flow until after the MVP release.
2. Test, test, test
Comprehensive testing is vital. Aim to get opinions from a few different stakeholders – not only those who represent your target audience, but also people who have domain knowledge in your new product’s industry or niche.
For efficiency, we’d recommend splitting your testing pool in half. So, if you have 10 people who are willing to test your prototype, show the raw version to the first five. They will quickly identify the major UX issues and obvious defects. Once you’ve fixed them, you can present the improved prototype to the remaining five testers. This cohort will be able to pick up on smaller issues that the previous group may have overlooked.
Try not to get too attached to your idea, either. Don’t be afraid to let go if it looks like your design has completely missed the mark.
Tools for rapid prototyping
- Google Sheets – one of the best free tools for creating rudimentary prototype frontends and backends. Super easy to integrate with hundreds of other tools and APIs.
- Figjam or Miro – collaborative whiteboards perfect for ideation sessions or for sketching out your initial ideas after screening.
- Figma – versatile, easy to use, and perfect for cross-team collaboration. By far our favorite tool for creating wireframes and high-fidelity design prototypes from scratch.
- Vimeo – for recording high-quality demos and sharing them across platforms.
- Typeform or Google Forms – for creating custom surveys and collecting feedback from those who tested your solution.
- Coda.io or Notion – for documenting product requirements and drawing conclusions on stakeholder feedback.
Wrapping up
A prototype is one of the best tools for validating a product idea and gathering feedback. But the key is to create and test them fast. As a concept, rapid prototyping reminds us that we don’t have to spend countless hours planning, building, and testing prototypes. Engineering and design teams don’t even need to be heavily involved in the process. It’s all about getting initial feedback on a barebones solution and transforming it into a working product.
Interested in hearing more about how we validate and scale product ideas for our clients and our own products? Check out our product development services and most recent case studies.